12 DIY Easter Egg Decorating Ideas for beginners
This post talks about Diy Easter Egg Decorating Ideas. Easter is a wonderful time of year filled with joy, celebration, and creativity. One of the highlights of this festive season is decorating Easter eggs, a fun tradition that brings families and friends together.
if you’re looking to add a splash of color to your home or want to create unique gifts, decorating eggs can be an enjoyable activity for everyone, especially beginners.
If you’re new to this craft, don’t worry! You don’t need to be an artistic genius or have fancy supplies to join the fun. With just a few simple materials and a bit of imagination, you can transform plain eggs into beautiful decorations that capture the spirit of Easter.
So, gather your supplies, roll up your sleeves, and get ready to explore some exciting DIY ideas that will inspire your creativity this Easter season!
1. Classic Dyes
One of the easiest ways to decorate Easter eggs is by dyeing them. You can buy dye kits from the store, or make your own with common kitchen items! Boil some water and mix in a tablespoon of vinegar and food coloring. Dip your eggs in the dye for a few minutes until they reach your desired color. Let them dry, and you’ll have beautiful, colorful eggs!
2. Crayon Resist

For a fun twist on dyeing, try the crayon resist method. Before dyeing your eggs, use a white crayon to draw designs or patterns on the shell. The wax from the crayon will resist the dye, so when you dip the egg, those areas will remain white. Once dry, your designs will pop against the colorful background!
3. Sticker Fun
Stickers can make decorating quick and easy! Grab some fun, colorful stickers and decorate your eggs by sticking them on. You can use shapes, letters, or even themed stickers to create unique designs. This method is especially great for kids because it’s simple and allows for lots of creativity.
4. Natural Dyes
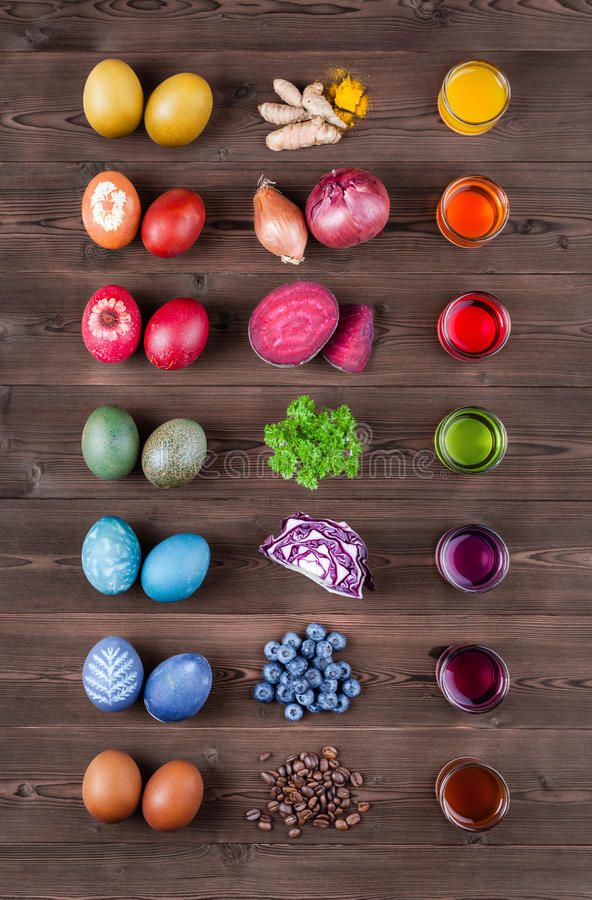
If you prefer a more natural approach, you can dye eggs using fruits and vegetables. Boil items like red cabbage for blue, turmeric for yellow, or beet juice for a lovely pink. Just simmer the items in water, strain it, then add your hard-boiled eggs. Natural dyes give a beautiful, soft appearance that is unique and eco-friendly!
5. Glitter Galore
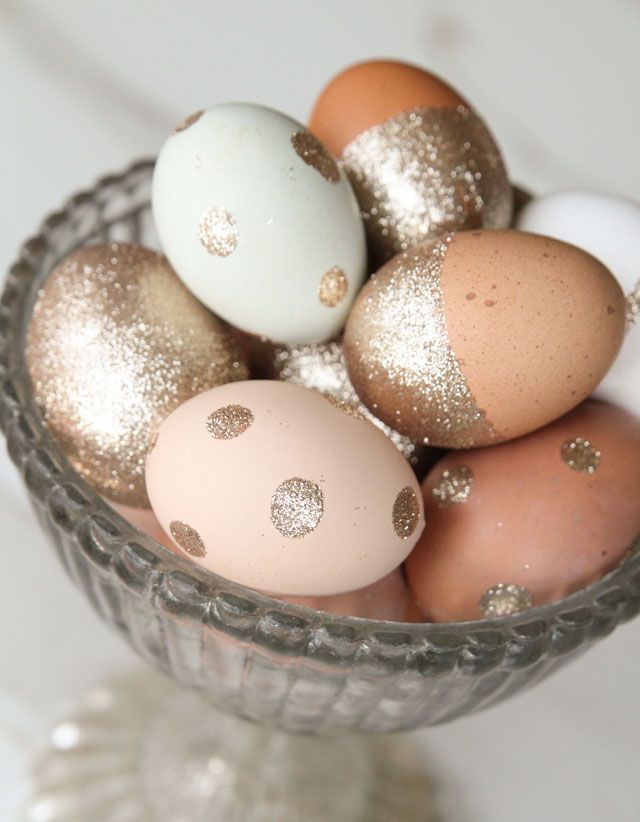
Add some sparkle to your eggs with glitter! Once you’ve dyed or painted your eggs, apply a layer of craft glue and sprinkle glitter on top. You can use different colors of glitter to create patterns or simply cover the whole egg. Just be prepared for some shine—it can get a little messy!
6. Painted Patterns
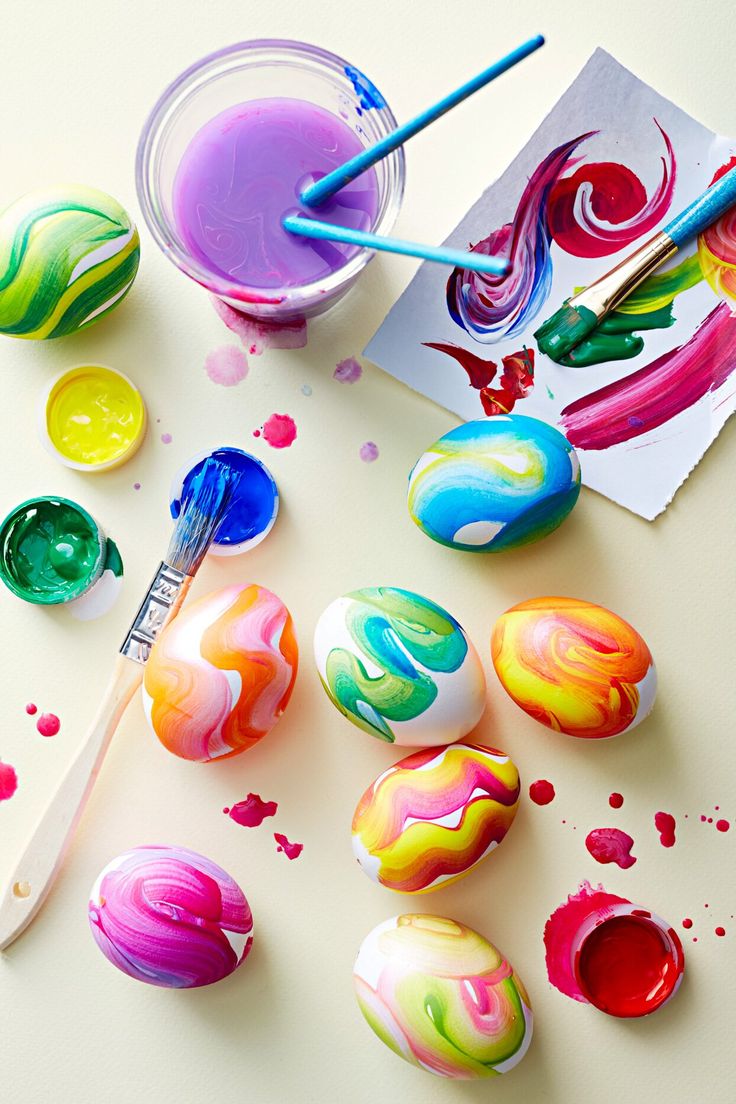
If you enjoy painting, grab a few paintbrushes and some acrylic paint. You can paint stripes, polka dots, or any design you can think of directly onto your eggs. This is a great way to express your creativity, and you don’t need to be a professional artist to have fun with it!
7. Washi Tape Designs
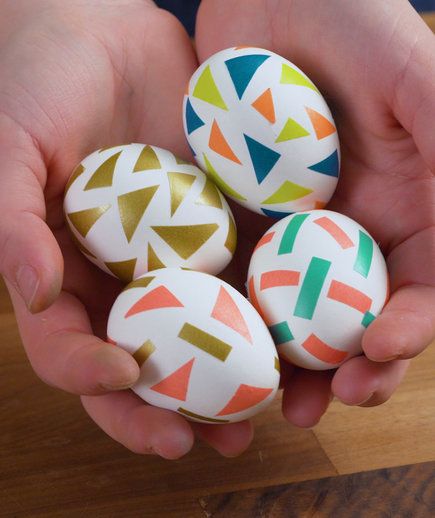
Washi tape, known for its colorful and decorative patterns, is perfect for egg decorating. Cut the tape into strips or shapes and stick it onto your eggs for a stylish look. This method is easy to manage and allows you to change the design whenever you want!
8. Decoupage Delight
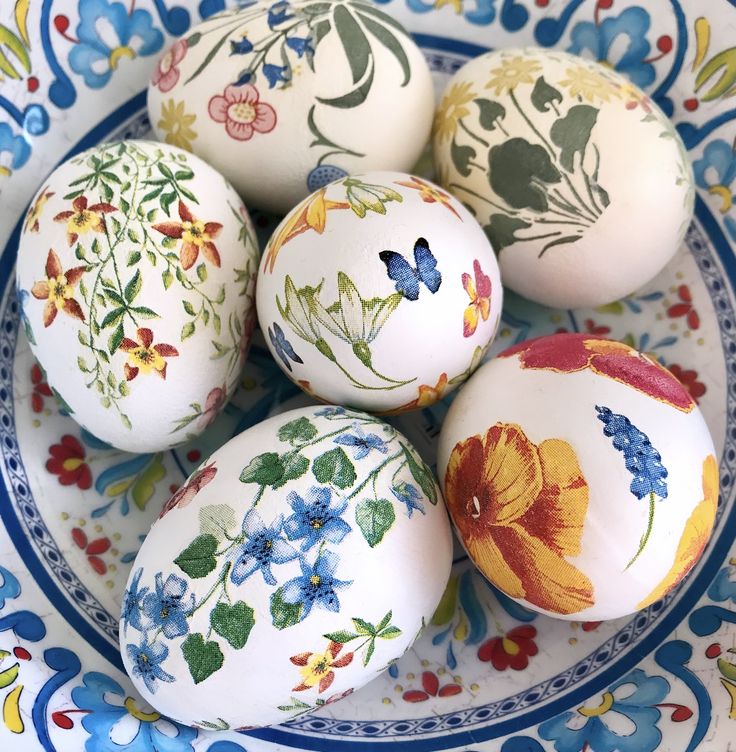
Decoupage is a fun technique where you glue paper cutouts onto your eggs. You can use magazine pages, wrapping paper, or even special decoupage paper. Apply a thin layer of glue to the egg, place your paper cut-outs, and seal everything with another layer of glue. Once dry, your eggs will have a lovely, artistic look!
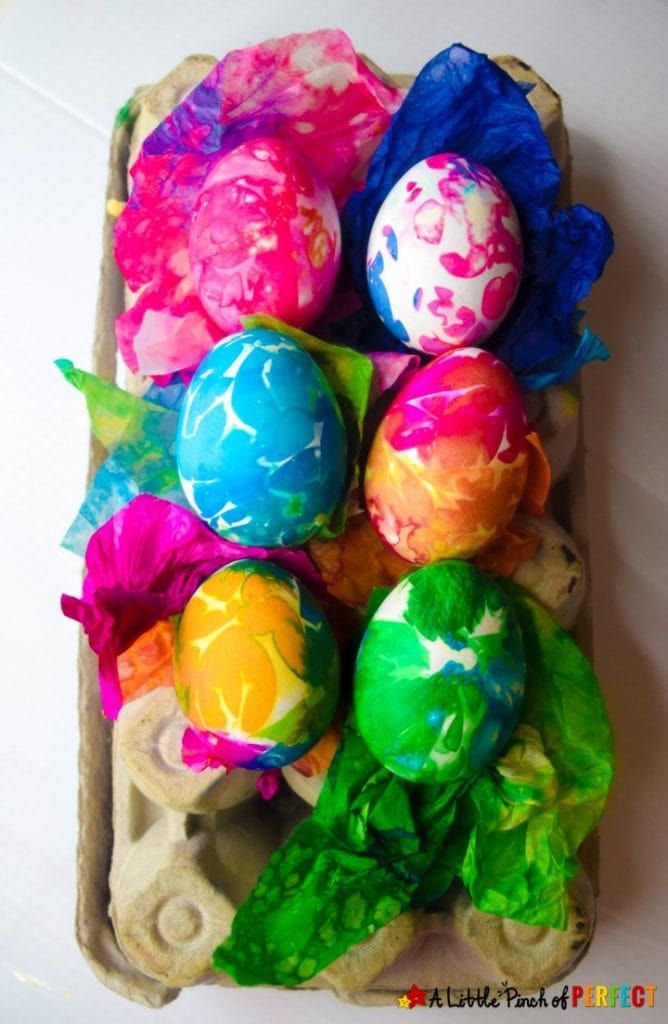
9. Marble Effect
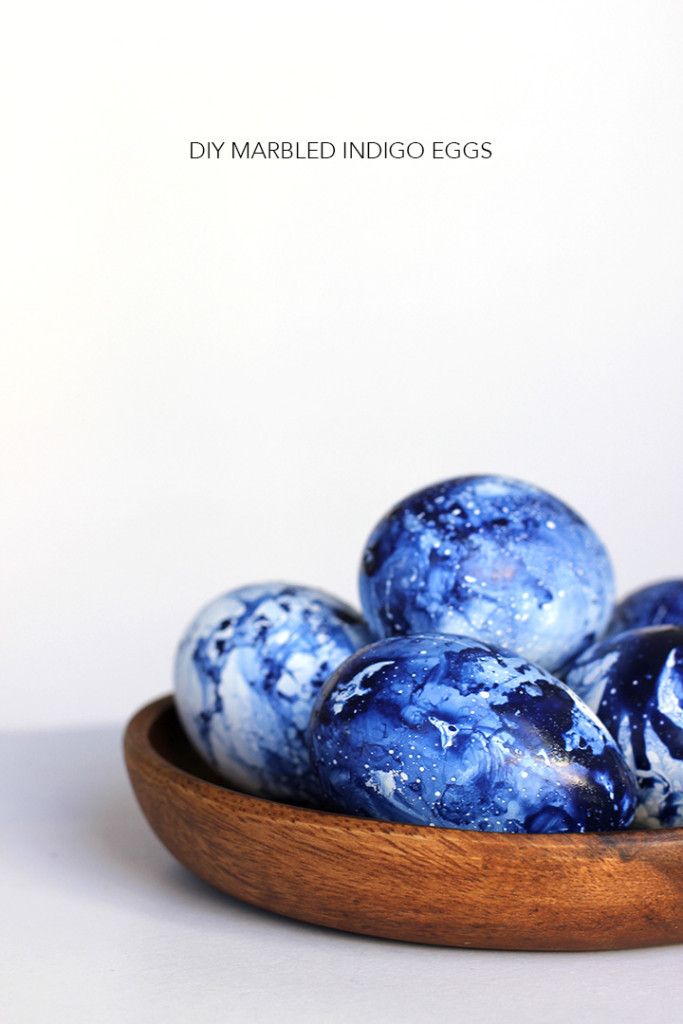
Create a stunning marble effect on your eggs with shaving cream! Spread shaving cream on a plate and add drops of food coloring. Swirl with a toothpick to create a marbled pattern. Roll a hard-boiled egg on the surface of the shaving cream and let it sit for about 10 minutes. Wipe off the cream to reveal a unique, marbled design!
10. Fabric Covered Eggs
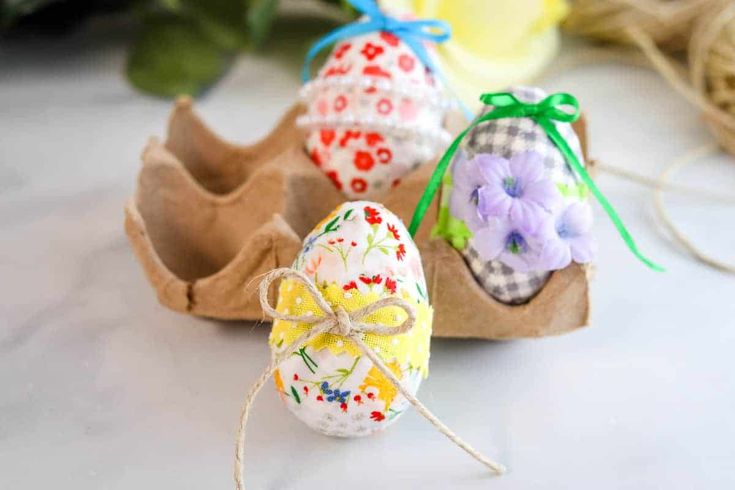
For a cozy, textured look, try covering your eggs with fabric. Cut small squares of fabric and use a little craft glue to adhere them to the egg. Feel free to mix and match different patterns and colors to create a one-of-a-kind look!
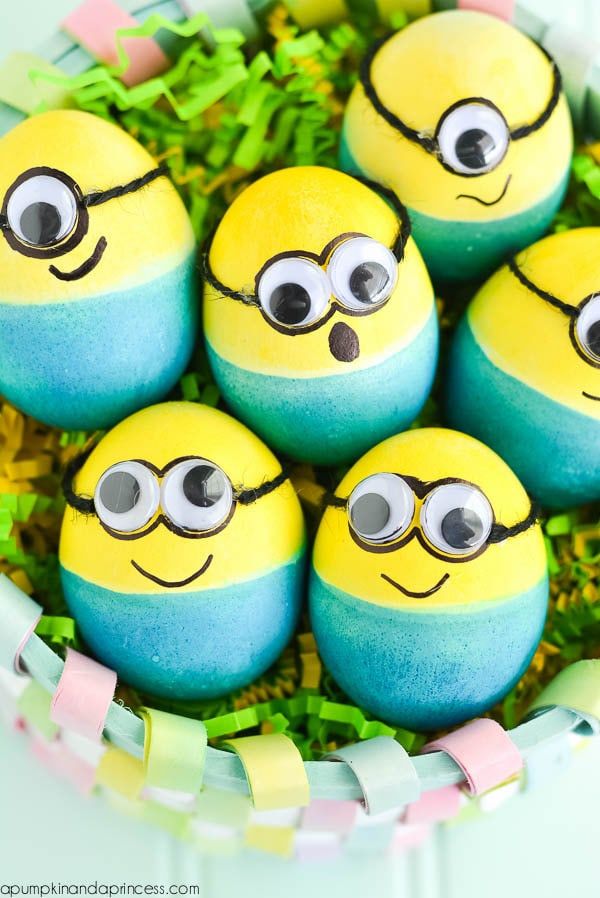
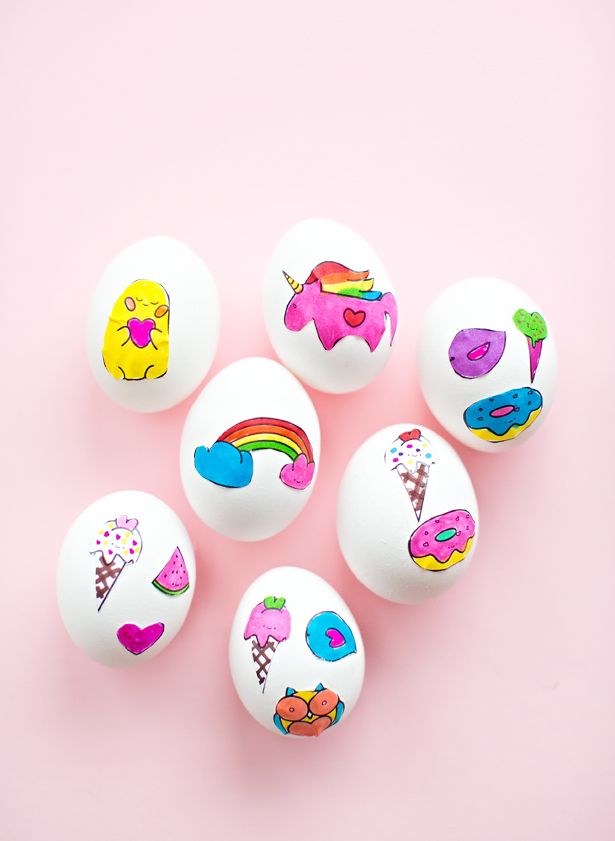
11. Eggselent Faces
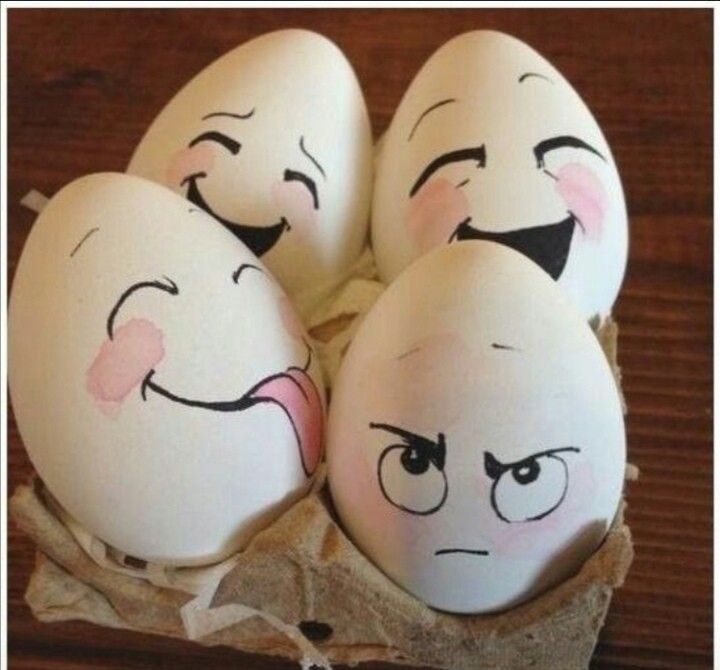
Why not give your eggs some personality? Use permanent markers to draw funny faces or silly designs. You can create characters from your favorite movies, animals, or even stick figures. This method is simple and allows for lots of creativity!
12. Embellished Eggs
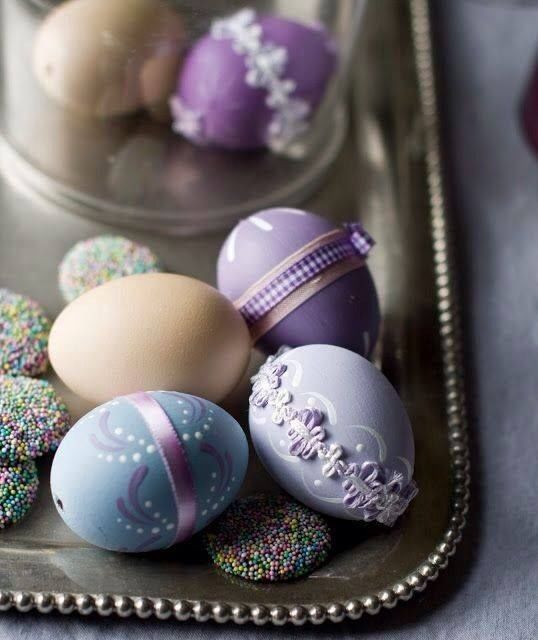
Last but not least, add embellishments like beads, sequins, or feathers to your eggs for extra flair. Use craft glue to attach these decorative pieces to your eggs, creating an eye-catching look that’s sure to impress. Mix and match different embellishments for a fun, unique style!
Decorating Easter eggs is a fantastic way to celebrate the season and express your creativity. These 12 DIY ideas are simple and perfect for beginners, so don’t hesitate to give them a try. Gather your supplies, invite some friends or family to join, and enjoy the fun of making beautiful, personalized Easter eggs! Happy decorating!